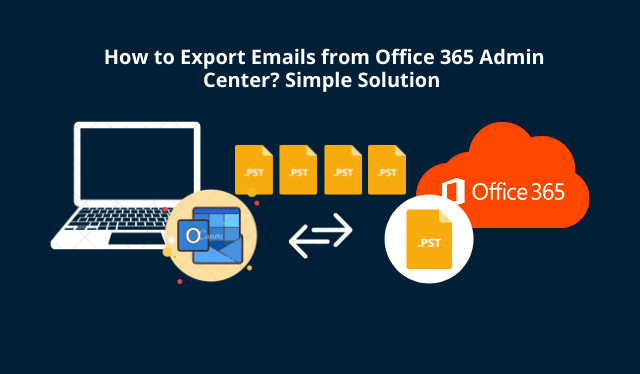
How to Export Office 365 Mailbox to PST from Admin Portal? Simple Steps to Follow
Summary: Read this article carefully and follow the below mentioned steps to export PST From Office 365 admin portal without facing any data loss. An automated solution is discussed to simplify the technicalities for O365 users. Let’s get into it!
You see, Office 365 is being the popular cloud platform, used by many organizations regardless of their size. Both users and admins make full use of the features of the cloud services.
However, in every organization, they need to go through audits and legal compliances. So, just imagine, what if you are in the middle of providing the required emails and suddenly lost your internet connection. And, yes, such a situation will ruin your time and effort
Hence, exporting all the important emails seems to be the best option.
But, sometimes users, as well as admins, are getting error messages while exporting their data. Are you the admin? And, not sure how to export PST from Office 365 admin portal?
Then, keep up with the article, as you are going to discover the most convenient automated method for exporting files.
However, in case you are wondering about a manual method to export PST files. Then, it is there. But, it’s quite a tiresome job to accomplish.
Export PST From Office 365 Admin Portal Manually Using eDiscovery
Content search eDiscovery is the native method that Microsoft provides for its Office 365 users.
Through eDiscovery, you can search and locate mailboxes and export search results in PST format.
At first, go to the Microsoft Admin center.
Manual Steps to Export Office 365 Mailbox to PST from Admin Portal
Step-1. Open the Microsoft 365 admin center and on the left-hand side of your screen, select Security from the menu.
Then the Security window will appear.
Step-2. Next, go to Permissions in the menu.
Step-3. Now, tick the eDiscovery manager checkbox as shown below. Then the eDiscovery Manager dialogue will pop up.
Step-4. In the next screen, hit the Edit Role Group.
Step-5. Next, in the Edit Role Group dialogue box, select ‘Choose Roles’ and ensure that Export is listed among Selected Roles. If not then select Edit and add the role.
Step-6. Now, go back to the Microsoft 365 admin center home page and from the menu present on the left-hand side of your screen, select Compliance.
Here the Compliance window will pop.
Step-7. Expand the menu on the left-hand side of your screen. Then, select Content search to export PST From Office 365 admin portal.
The Content search dialogue will appear.
Step-8. Click on the ‘New search’
Step-9. Then click the ‘Add conditions’ as shown.
Step-10. When the menu opens on the screen, tick the ‘Type’ checkbox.
Step-11. Click on the ‘Add’ button.
Step-12. After that, select ‘Save & run’.
Step-13. Then, input a name, fill the description box for your search, and select Save.
Step-14. Next, in Content search, press the ‘Back to saved searches’
Step-15. Now, select the search query and wait for the process to complete. Then click ‘Export Results’ to export PST From Office 365 admin portal.
Downsides of Using the Content Search eDiscovery Method
As you see from the above section, it is a very complicated and lengthy approach.
Also, if you have a huge number of PST files to export then it may take ages to complete the task.
Moreover, many Office 365 users have complained that it hangs and crashes at the last minute. And, they also get different error messages in between the process.
Thus, this method seems to be unfit when it comes to handling your precious data.
However, do not worry, as you will come out of the hard time you might be facing while exporting data. And, you will find the solution is in the next section.
The Efficient way to Export PST From Office 365 Admin Portal With a Single Click
Your mailbox does not just contain emails but years of hard work. Careful handling such important files without losing any information is very much crucial.
So, who is ready to take responsibility for your data? Well, the Most Professional Office 365 Export Software will fulfill the expectation. How?
Here’s the answer. According to many IT admins, the software stood in the frontline and without any difficulty exported PST files from Office 365 admin portal.
Hence, you can also put your faith in this reliable tool to export your data.
Software Steps to Export Office 365 Mailbox to PST Using Admin Account
Simply follow the below procedure and get the work done.
Step-1: Install the software. Then, launch it on your system.
Step-2: Press the ‘Login’ button.

Step-3: Type the login credentials. And mark the checkbox corresponding to ‘IsAdmin’. And click ‘Sign In’.

Step-4: Select the necessary user IDs to be exported and click on the ‘Next’ button.

Step-5: Select the radio button against ‘Microsoft Outlook(.pst) and select the
email format as PST to export PST From Office 365 admin portal
[Note: Tick the check box ‘Split Outlook Data Filter’ and enter the file size to be split]

Step-6: Select the categories such as emails, contacts, calendars as shown.
[Note: Apply the ‘Date Filter’ by clicking on the checkbox against it. And then click on the ‘Set’]

Step-7: Click on the ‘Browse’ button to choose the destination folder path.

Step-8: Finally, click on the ‘Start’ button.

Step-9: The export process will then start to export PST From Office 365 admin portal.
Step-10: Finally click on the ‘Save Report’.
Conclusion
In this article, you got to know two methods to export PST From Office 365 admin portal. Now, it is up to you to decide, whether you want to opt for a complex or easy method. The choice is yours!
Also Read: Migrate Exchange On-Premise to Exchange Online – Quick & Reliable Migration Guide